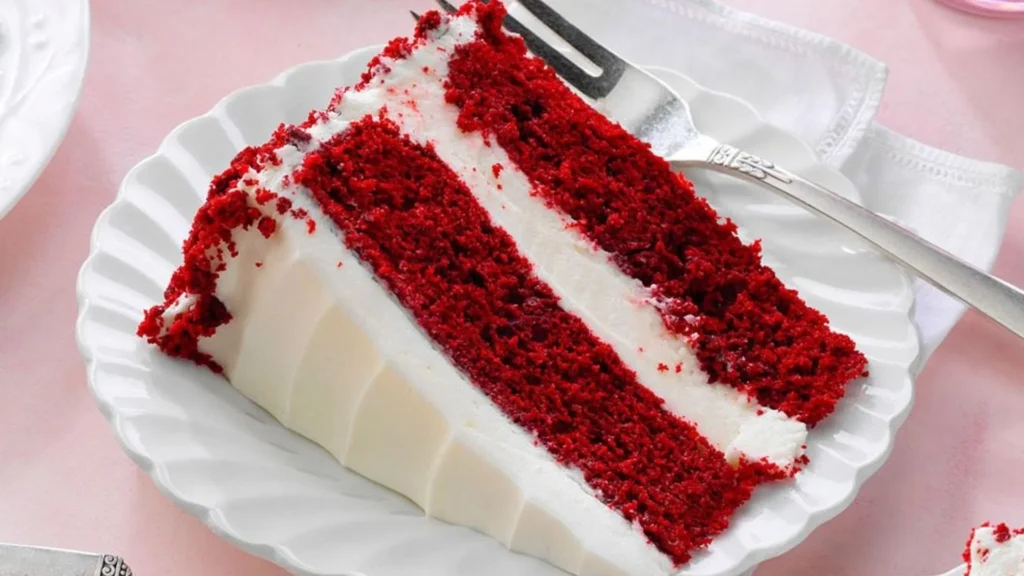
Red Velvet Cake Recipe Waldorf Astoria is a classic American dessert known for its deep red colour, tender crumb, and rich cream cheese frosting.
This Red Velvet Cake Recipe Waldorf Astoria is deeply delicious, balanced by a slight cocoa flavour and topped with creamy frosting.
I made this Red Velvet Cake Recipe Waldorf Astoria after watching a classic feature about its origins in the Waldorf Astoria Hotel.
The main speciality lies in its velvety texture and unique history. I will now show up and show step by step how to make this iconic Red Velvet Cake Recipe Waldorf Astoria.
Why We Love This Red Velvet Cake Recipe Waldorf Astoria?
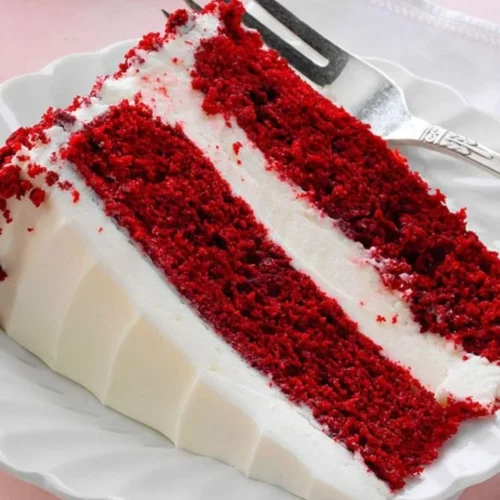
We love this Red Velvet Cake Recipe Waldorf Astoria because of its smooth texture, bold red color, and classic charm.
The flavor is rich yet balanced, with a hint of cocoa and the perfect contrast from the creamy frosting. This Red Velvet Cake Recipe Waldorf Astoria brings a sense of tradition and elegance to the table.
Each slice feels indulgent and memorable. The Red Velvet Cake Recipe Waldorf Astoria is straightforward, and the result is always impressive.
Everyone remembers their first bite of this iconic Red Velvet Cake Recipe Waldorf Astoria.
How To Prepare Red Velvet Cake Recipe Waldorf Astoria?
Recipe Overview
Preparation time: 30 minutes
Cooking time: 40 minutes
Total time: 1 hour 10 minutes
Course: Dessert
Cuisine: American
Yield: 12 servings
Equipment Needed
- Mixing bowls
- Electric mixer or stand mixer
- Measuring cups and spoons
- 9-inch round cake pans (2)
- Cooling rack
- Spatula
- Whisk
Ingredients
For The Cake
- 2 cups cake flour
- 1 cup granulated sugar
- 1 teaspoon baking soda
- 1 teaspoon salt
- 2 heaping tablespoons cocoa powder
- 1 ½ cups vegetable oil
- 1 teaspoon pure vanilla extract
- 1 teaspoon vinegar
- ½ cup shortening
- 1 cup buttermilk
- 2 large eggs
- 2 tablespoons red food colouring
For The Cream Cheese Frosting
- 16 oz cream cheese, softened
- 1 teaspoon pure vanilla extract
- 3 tablespoons flour
- 1 cup milk
- 1 cup granulated sugar
- 1 cup butter
Instructions
1. Get The Oven Ready And Prep Your Pans
Start by setting your oven to 350°F (175°C) so it can preheat. While that’s happening, take two 9-inch round cake pans and grease them well. You can also line them with parchment paper if you want to make removing the cakes easier later.
2. Mix The Dry Ingredients
Grab a large mixing bowl and sift in your cake flour, sugar, baking soda, salt, and cocoa powder. Give everything a good stir so it’s well blended.
3. Whisk The Wet Ingredients
In a separate bowl, whisk together the vegetable oil, buttermilk, eggs, red food colouring, vanilla, vinegar, and softened shortening. Make sure everything comes together into a smooth, even mixture.
4. Make The Cake Batter
Slowly pour the wet ingredients into the dry mixture. Mix on low speed or gently by hand until everything is just combined. Don’t over mix it’ll help keep the cake nice and soft.
5. Bake The Cakes
Pour the batter evenly into the two pans. Slide them into the oven and bake for 35–40 minutes. You’ll know they’re done when a toothpick inserted in the middle comes out clean. Let the cakes cool in the pans for about 10 minutes, then gently remove them and let them cool completely on wire racks.
6. Make The Cream Cheese Frosting
In a medium saucepan, stir together the flour, sugar, and milk over medium heat. Keep stirring until the mixture thickens and starts to bubble gently. Take it off the heat and let it cool completely. Once cooled, beat the softened cream cheese and butter in a separate bowl until smooth and creamy. Add vanilla, then slowly mix in the cooled flour mixture. Beat until the frosting is light and fluffy.
7. Put The Cake Together
Place one cake layer on your serving plate. Spread a thick layer of frosting on top. Add the second layer and frost the top and sides of the whole cake. Chill it in the fridge for at least 30 minutes to help the frosting firm up before slicing and serving.
Nutrition Facts Per Serving
| Nutrition | Amount |
|---|---|
| Calories | 420 |
| Fat | 28g |
| Saturated Fat | 12g |
| Cholesterol | 80mg |
| Sodium | 320mg |
| Carbohydrates | 40g |
| Fiber | 1g |
| Sugars | 30g |
| Protein | 5g |
Ways To Use It
Serve Red Velvet Cake Recipe Waldorf Astoria as a centrepiece dessert at gatherings or special dinners. Slice it into elegant portions for afternoon tea or brunch.
Use leftovers to create layered trifles in small glasses. Turn it into cake pops for party treats or festive gift boxes.
Pair it with fresh berries or whipped cream for added flair. Offer it during holiday celebrations or birthdays where tradition and flavour make the moment more memorable and indulgent.
Pro Tips And Tricks
➢ Don’t over mix the batter, gentle folding helps maintain softness.
➢ Always use cake flour for a lighter, more tender crumb that defines this classic cake’s texture.
➢ Mix cocoa and food colouring first for a smoother red colour throughout the batter.
➢ Bring eggs, buttermilk, and butter to room temperature for even mixing and better structure.
➢ Chill the frosting before spreading to make it easier to work with and achieve cleaner layers.
Incredible Essential Health Benefits
➤ Contains antioxidants from natural cocoa, which can support heart health in moderate amounts.
➤ Homemade preparation allows for better ingredient control, reducing additives and enhancing overall nutritional value.
➤ Buttermilk provides calcium and probiotics that may aid digestion and bone strength.
➤ Eggs supply high-quality protein and essential vitamins such as B12 and D.
➤ The controlled use of sugar and portioning can help satisfy sweet cravings without overindulgence.
How To Store The Finished Red Velvet Cake Recipe Waldorf Astoria?
Store the finished Red Velvet Cake Recipe Waldorf Astoria in an airtight container to keep it moist and fresh. Place it in the refrigerator if frosted, especially when using cream cheese frosting, to maintain texture and safety.
Allow the Red Velvet Cake Recipe Waldorf Astoria to sit at room temperature for 20–30 minutes before serving to enhance flavour and softness.
For longer storage, wrap slices individually and freeze them. Thaw overnight in the refrigerator or briefly at room temperature before enjoying again.
Frequently Asked Questions
What Gives The Cake Its Distinctive Red Colour?
The red food colouring combined with cocoa powder creates the cake’s signature deep red hue.
Can I Substitute Buttermilk In The Recipe?
Yes, a mixture of milk and lemon juice or vinegar can replace buttermilk as a homemade alternative.
Why Does The Recipe Use Both Shortening And Vegetable Oil?
Shortening adds tenderness and structure, while vegetable oil keeps the cake moist.
How Long Should The Cake Cool Before Frosting?
Allow the cake to cool completely, about one hour, to prevent frosting from melting.
What Makes The Cream Cheese Frosting Special?
The frosting combines cream cheese, butter, and a cooked flour mixture for a smooth, rich texture unique to this recipe.
Can This Cake Be Made Ahead Of Time?
Yes, bake and frost the cake a day ahead, then store it refrigerated until serving.
Conclusion
My Red Red Velvet Cake Recipe Waldorf Astoria was an easy and truly delicious success. I enjoyed every step, from mixing to the final sweet bite.
I hope you feel inspired to try this classic Red Velvet Cake Recipe Waldorf Astoria yourself. It’s simple to make, rich in flavor, and always impressive.
Now it’s your turn bake it soon and let me know how delicious it turns out for you. I’m excited to hear your experience!
More Cake Recipes You’ll Love
Best Cookies And Cream Cake Pop Recipe
Strawberry Cheesecake Ice Cream Cake Recipe | Sweet And Creamy
Southern Pecan Caramel Cake || Moist And Buttery
Mile High Pound Cake Recipe || Fluffy And Flavorful
Delightful Caterpillar Cake Recipe
Red Velvet Cake Recipe Waldorf Astoria
Equipment
- Mixing bowls
- Electric mixer or stand mixer
- Measuring cups and spoons
- 9-inch round cake pans (2)
- Cooling rack
- Spatula
- Whisk
Ingredients
For The Cake
- 2 cups cake flour
- 1 cup granulated sugar
- 1 teaspoon baking soda
- 1 teaspoon salt
- 2 heaping tablespoons cocoa powder
- 1 ½ cups vegetable oil
- 1 teaspoon pure vanilla extract
- 1 teaspoon vinegar
- ½ cup shortening
- 1 cup buttermilk
- 2 large eggs
- 2 tablespoons red food colouring
For The Cream Cheese Frosting
- 16 oz cream cheese softened
- 1 teaspoon pure vanilla extract
- 3 tablespoons flour
- 1 cup milk
- 1 cup granulated sugar
- 1 cup butter
Instructions
Get The Oven Ready And Prep Your Pans
- Start by setting your oven to 350°F (175°C) so it can preheat. While that’s happening, take two 9-inch round cake pans and grease them well. You can also line them with parchment paper if you want to make removing the cakes easier later.
Mix The Dry Ingredients
- Grab a large mixing bowl and sift in your cake flour, sugar, baking soda, salt, and cocoa powder. Give everything a good stir so it’s well blended.
Whisk The Wet Ingredients
- In a separate bowl, whisk together the vegetable oil, buttermilk, eggs, red food colouring, vanilla, vinegar, and softened shortening. Make sure everything comes together into a smooth, even mixture.
Make The Cake Batter
- Slowly pour the wet ingredients into the dry mixture. Mix on low speed or gently by hand until everything is just combined. Don’t over mix it’ll help keep the cake nice and soft.
Bake The Cakes
- Pour the batter evenly into the two pans. Slide them into the oven and bake for 35–40 minutes. You’ll know they’re done when a toothpick inserted in the middle comes out clean. Let the cakes cool in the pans for about 10 minutes, then gently remove them and let them cool completely on wire racks.
Make The Cream Cheese Frosting
- In a medium saucepan, stir together the flour, sugar, and milk over medium heat. Keep stirring until the mixture thickens and starts to bubble gently. Take it off the heat and let it cool completely. Once cooled, beat the softened cream cheese and butter in a separate bowl until smooth and creamy. Add vanilla, then slowly mix in the cooled flour mixture. Beat until the frosting is light and fluffy.
Put The Cake Together
- Place one cake layer on your serving plate. Spread a thick layer of frosting on top. Add the second layer and frost the top and sides of the whole cake. Chill it in the fridge for at least 30 minutes to help the frosting firm up before slicing and serving.
Notes
Nutrition Facts
Calories: 420 | Fat: 28g | Saturated Fat: 12g | Cholesterol: 80mg | Sodium: 320mg | Carbohydrates: 40g | Fiber: 1g | Sugars: 30g | Protein: 5g
Hi, I’m Samia! I’ve spent the past five years creating recipes that are both delicious and unique. Cooking is my passion, and I love exploring different cuisines, blending flavors, and turning everyday meals into something memorable. From quick weeknight dinners to festive feasts, I aim to make every dish special. I’d love for you to join me on this culinary journey together we’ll explore simple, easy-to-follow recipes and tips that make cooking fun, inspiring, and full of joy!