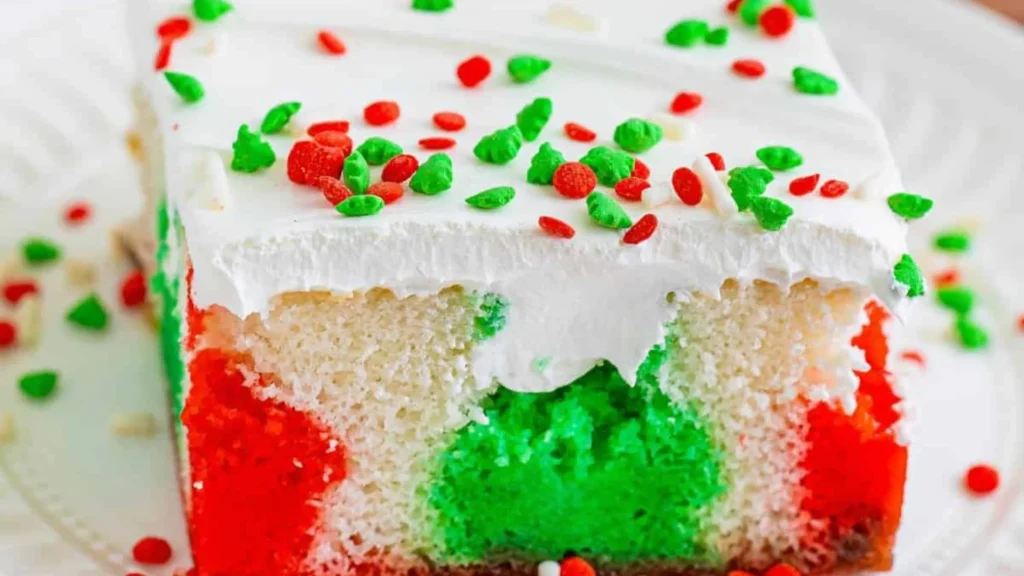
Cranberry Poke Cake Recipe is a delicious dessert made by baking a white or yellow cake, then poking holes throughout and filling them with a cranberry sauce mixture.
I created this Cranberry Poke Cake Recipe to bring a fresh and festive touch to holiday celebrations. What makes it special is the juicy cranberry filling that seeps into the Cranberry Poke Cake Recipe, adding bright, tangy flavor in every bite.
Based on my experience, gently poking the holes and pouring the cranberry mixture slowly are essential for a perfectly moist and flavourful Cranberry Poke Cake Recipe.
Why We Love This Cranberry Poke Cake Recipe?
Cranberry Poke Cake Recipe is loved for its soft, moist texture combined with the zesty cranberry filling that soaks into the Cranberry Poke Cake Recipe, creating a perfect balance of sweet and tart flavors.
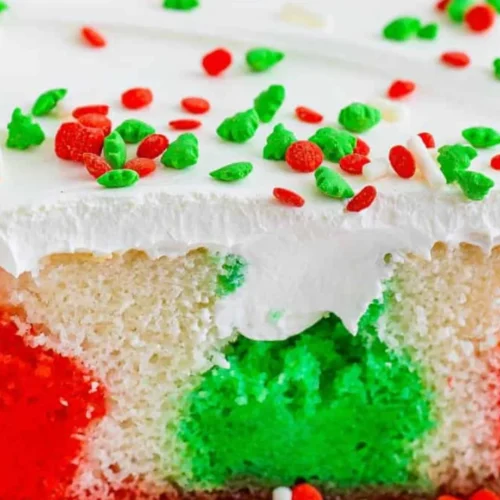
The bright cranberry layer adds a refreshing touch that livens up each bite. This dessert’s beautiful presentation and rich taste bring a special touch to any meal.
Easy to prepare and irresistibly delicious, it always leaves a lasting impression.
How To Prepare Cranberry Poke Cake Recipe?
Recipe Overview
Preparation Time: 20 minutes
Cooking Time: 35 minutes
Total Time: 55 minutes
Yield: Serves 16
Course: Dessert
Difficulty: Easy
Cuisine: American
Equipment Needed
- Mixing bowls
- Electric hand or stand mixer
- Measuring cups and spoons
- 9×13-inch baking pan
- Fork or wooden skewer (for poking holes)
- Spatula
Ingredients
- 2 boxes white or yellow cake mix
- 1 box cranberry flavoured gelatin (Jell‑O)
- 1 can whole berry cranberry sauce
- 6 large eggs
- 1 cup vegetable oil
- 1 cup cold water and 1 cup boiling water
- 1 cup whole milk
- 8 oz Cool Whip thawed
- Red and green sprinkles
Instructions
Step 1: Get Your Oven Ready:
Heat the oven to 350°F (175°C). Lightly grease a 9×13-inch baking pan it with parchment paper to keep the cake from sticking.
Step 2: Mix The Cake Batter
In a big bowl, combine the two cake mixes with the eggs, vegetable oil, water, and milk. Use an electric mixer on medium speed and beat everything together for about 2 to 3 minutes until the batter is smooth and well combined.
Step 3: Bake The Cake
Pour the batter into your prepared pan and pop it into the oven. Bake for around 30 to 35 minutes. Check it by inserting a toothpick in the center if it comes out clean, it’s done! Let the cake cool for about 15 minutes before moving on.
Step 4: Prepare The Cranberry Topping
While the cake cools, grab a separate bowl. Dissolve the cranberry flavoured gelatin in 1 cup of boiling water. Then stir in the whole berry cranberry sauce until it’s all mixed together. If the cranberry sauce is too thick, you can warm it up a little to make stirring easier.
Step 5: Make Holes In The Cake
Take a fork or a wooden skewer and gently poke holes all over the cake surface. Space them about an inch apart so the cranberry mixture can soak in evenly.
Step 6: Add The Cranberry Mixture
Slowly spoon or pour the cranberry gelatin mix over the cake. Let it seep into the holes you just poked. Then, place the cake in the fridge for at least 2 hours so it can fully set.
Step 7: Top With Cool Whip
Once the cranberry layer has set, spread a layer of thawed Cool Whip evenly over the top.
Step 8: Decorate For Fun
Sprinkle some red and green sprinkles on top to give it a festive holiday look.
Step 9: Keep It Chilled And Serve
Keep the cake refrigerated until you’re ready to enjoy it. When it’s time, slice it up and dig in!
Note
This is meant as a festive, indulgent dessert not a daily health food. Nutrition can vary by brands.
Nutrition Facts Per Serving
| Nutrition | Amount |
|---|---|
| Calories | 293 kcal |
| Carbohydrates | 56 g |
| Protein | 5 g |
| Fat | 17 g |
| Saturated Fat | 10 g |
| Sugar | 41 g |
| Fiber | 1 g |
Helpful Tips
➢ Use room temperature ingredients for a smoother cake batter.
➢ Allow the cake to cool slightly before poking holes to prevent crumbling.
➢ Chill the cake for at least two hours to let the flavors set properly.
➢ Pour the cranberry mixture slowly to let it soak evenly into the cake.
➢ Spread the whipped topping gently to keep the cake moist underneath.
Ways To Use It
1. Serve as a festive dessert during holiday meals to impress guests.
2. Cut into small squares for a delicious treat at parties or gatherings.
3. Use as a creative addition to a dessert buffet or potluck.
4. Pair with a scoop of vanilla ice cream for an indulgent dessert.
5. Enjoy as a sweet snack alongside a cup of tea or coffee.
Healthy Nutrition Benefits
➤ Cranberries contain natural antioxidants that help reduce oxidative stress in the body.
➤ Vitamin C found in cranberries supports immune health and skin vitality.
➤ Whole berry cranberry sauce adds dietary fiber, supporting digestive health.
➤ The cake provides small amounts of protein from eggs, which aid in muscle repair.
➤ Healthy fats from vegetable oil contribute to sustained energy and nutrient absorption.
How To Store Leftovers Cranberry Poke Cake Recipe?
Leftover Cranberry Poke Cake Recipe should be kept in an airtight container to preserve moisture and freshness.
Refrigeration is important to maintain the texture of the cranberry filling and whipped topping. Avoid leaving the cake out too long to prevent spoilage.
Before serving, allow it to sit at room temperature briefly to soften slightly. Stored this way, the Cranberry Poke Cake Recipe stays delicious and enjoyable for up to four days.
Frequently Asked Questions
Can I Use Homemade Cranberry Sauce Instead Of Canned?
Yes, homemade cranberry sauce works well and adds a fresher taste.
Can This Cake Be Made Ahead Of Time?
Yes, it’s best when chilled for a few hours or overnight before serving.
What Type Of Cake Mix Should I Use?
White or yellow cake mix both work well for this recipe.
Can I Use Different Jell-O Flavours?
Yes, raspberry or cherry Jell-O can be used as alternatives for a flavour twist.
Conclusion
My Cranberry Poke Cake Recipe was easy to make and turned out delicious a real success! I truly enjoyed every bite and hope this simple Cranberry Poke Cake Recipe inspires you to try it yourself.
It’s perfect for any festive occasion or whenever you want a tasty, unique dessert. I can’t wait for you to make it soon please let me know how delicious it turns out!
If You Love Cake Recipe Try These Out!
Butter Pecan Praline Poke Cake Recipe || Southern Style
Swedish Nut Cake Recipe: A Perfect Sweet Treat
Delicious Butterscotch Cake with Caramel Frosting
Classic One Bowl Chocolate Cake Recipe
Cranberry Poke Cake Recipe
Equipment
- Mixing bowls
- Electric hand or stand mixer
- Measuring cups and spoons
- 9×13 inch baking pan
- Fork or wooden skewer (for poking holes)
- Spatula
Ingredients
- 2 boxes white or yellow cake mix
- 1 box cranberry flavoured gelatin Jell‑O
- 1 can whole berry cranberry sauce
- 6 large eggs
- 1 cup vegetable oil
- 1 cup cold water and 1 cup boiling water
- 1 cup whole milk
- 8 oz Cool Whip thawed
- Red and green sprinkles
Instructions
Step 1: Get Your Oven Ready:
- Heat the oven to 350°F (175°C). Lightly grease a 9×13-inch baking pan it with parchment paper to keep the cake from sticking.
Step 2: Mix The Cake Batter
- In a big bowl, combine the two cake mixes with the eggs, vegetable oil, water, and milk. Use an electric mixer on medium speed and beat everything together for about 2 to 3 minutes until the batter is smooth and well combined.
Step 3: Bake The Cake
- Pour the batter into your prepared pan and pop it into the oven. Bake for around 30 to 35 minutes. Check it by inserting a toothpick in the center if it comes out clean, it’s done! Let the cake cool for about 15 minutes before moving on.
Step 4: Prepare The Cranberry Topping
- While the cake cools, grab a separate bowl. Dissolve the cranberry flavoured gelatin in 1 cup of boiling water. Then stir in the whole berry cranberry sauce until it’s all mixed together. If the cranberry sauce is too thick, you can warm it up a little to make stirring easier.
Step 5: Make Holes In The Cake
- Take a fork or a wooden skewer and gently poke holes all over the cake surface. Space them about an inch apart so the cranberry mixture can soak in evenly.
Step 6: Add The Cranberry Mixture
- Slowly spoon or pour the cranberry gelatin mix over the cake. Let it seep into the holes you just poked. Then, place the cake in the fridge for at least 2 hours so it can fully set.
Step 7: Top With Cool Whip
- Once the cranberry layer has set, spread a layer of thawed Cool Whip evenly over the top.
Step 8: Decorate For Fun
- Sprinkle some red and green sprinkles on top to give it a festive holiday look.
Step 9: Keep It Chilled And Serve
- Keep the cake refrigerated until you’re ready to enjoy it. When it’s time, slice it up and dig in!
Notes
Nutrition Facts
Calories: 293 kcal | Carbohydrates: 56 g | Protein: 5 g | Fat: 17 g | Saturated Fat: 10 g | Sugar: 41 g | Fiber: 1 g
“Hi, I’m Samia, a passionate recipe creator with 5 years of experience in crafting delicious, unique dishes. My love for cooking has led me to explore a variety of cuisines, combining flavors to create memorable meals for every occasion. Whether it’s a simple weeknight dinner or an elaborate feast, I believe in making every dish special. Join me on my culinary journey as I share easy-to-follow recipes and tips that will inspire your cooking and bring joy to your kitchen!”